
The HSM market is booming. Every year the chance of a breach affecting a given organisation increases as attacks become more advanced. Since the inception of the HSM itself, the biggest reasons an organisation might shy away from investing in an HSM solution are cost and complexity. Even today, best-of-breed HSMs are going to run in the tens of thousands of dollars. These HSMs can support high volumes of concurrent requests, and are fully PCI compliant. Large deployments of these devices might warrant a dedicated administrator. One such device in this category is Thales’ Luna HSM (Thales was formerly Gemalto, and is known not only for world-class HSMs but for hardware licensing dongles which have fallen out of favour in recent years). Much more recently, entry-level HSMs have hit the scene. Two of the most popular contenders in this class are the Yubikey HSM (retails for A$936) and the Nitrokey HSM (retails for about A$100). These devices are not going to provide the same level of performance as HSMs geared towards large enterprises, yet there is an appeal for the use cases they are suitable for. Over the next few weeks we will be featuring a series of articles on the NitroKey HSM.
Fundamentals
The Nitrokey HSM implements PKCS#11 which is a set of standards for offloading cryptographic operations. It supports many different libraries, making it suitable for a wide array of use cases. These include the CSP driver in Windows, Java’s JCE provider, GnuPG, and OpenSC. We will be focusing on interfacing with the device thru Ubuntu using OpenSC’s implementation of PKCS#11. NitroKey provides an excellent getting started page www.nitrokey.com/documentation/applications, but the barrier to entry from a complexity standpoint is still pretty steep. We will provide more in-depth and battle tested guidance over the next few weeks.
Getting Started
n.b. For those that might be using this in a vSphere VM, you will need to set the
usb.generic.allowCCID = "TRUE"
in your VMX configuration file to enable USB smartcard passthru. Otherwise, OpenSC will not be able to talk to the HSM.
The first thing we will need to do is setup our environment and provision the device:
shell
apt-get install opensc
Now we can provision the HSM.
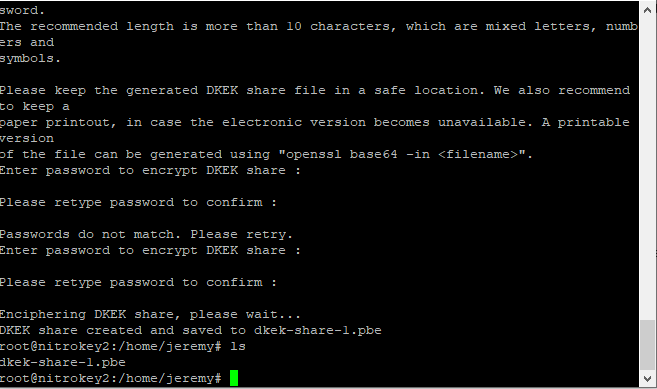
First we will create a keyfile called a DKEK (device encryption key) and set its password. This key is a symmetric key used later for exporting private key material from the device. Exports will be encrypted with the DKEK, and it is expected that they will be imported into another NitroKey device to recover the private key material. If you want more than one DKEK (for example, if you require 2 company officers to BOTH be present to perform these sorts of operation) each would generate a DKEK and provide their own password.
shell
sc-hsm-tool --create-dkek-share dkek-share-1.pbe
shell
sc-hsm-tool --initialize --so-pin 3a59572cc4f0e5c2 --pin 123456 --dkek-shares 1
You will need to choose your own values for the so-pin, and the user pin.
The SO (Security Officer) pin is required for special highly sensitive functions. For example “unblocking” the device after the user pin has been incorrectly entered enough times for the device to lock up. Choose 16 random hexadecimal characters for your SO-PIN and keep this value a secret! www.browserling.com/tools/random-hex can be used to generate this value.
If the device does not have an SO pin set, the above command will set it. It cannot be recovered if lost, and will render your device useless.
The pin itself should be set to a 6 digit decimal value, and will be used when making standard requests to the HSM device.
The above command provisions a “slot” for the DKEK, but we still have to import it onto the device.
shell
sc-hsm-tool --import-dkek-share dkek-share-1.pbe
(you will be prompted to enter the password for the DKEK you chose above)
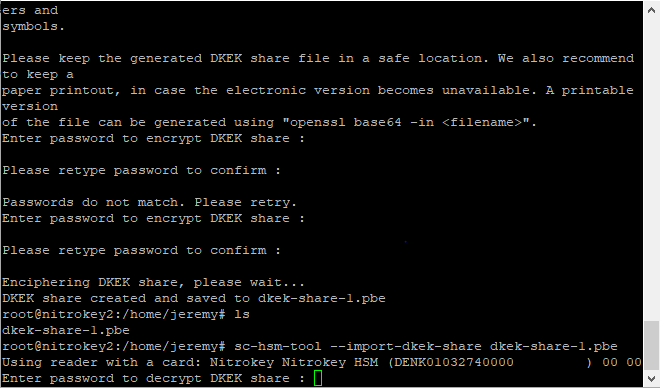
OpenSC’s documentation recommends printing a physical copy of the password protected DKEK. Generate a printable copy with the below command and store it in a lockbox:
shell
openssl base64 -in dkek-share-1.pbe
While a Nitrokey can be provisioned without any DKEK, without at least one it will not export private key material from the device at all. It is worth noting that it supports what they call an “M of N” scheme to allow for say “3 of 5” company officers to be present with their DKEK and password to allow for these kinds of sensitive operations. This allows for human redundancy if one of the company officers forgets his or her password, or gets hit by a bus.
We can’t very well export a key that doesn’t exist, so let’s create one now in order to demonstrate the key export. Notice that the pin, NOT the SO PIN is needed for this operation.
shell
pkcs11-tool --module /usr/lib/x86_64-linux-gnu/opensc-pkcs11.so -l --pin 648219 --keypairgen --key-type rsa:2048 --id 10
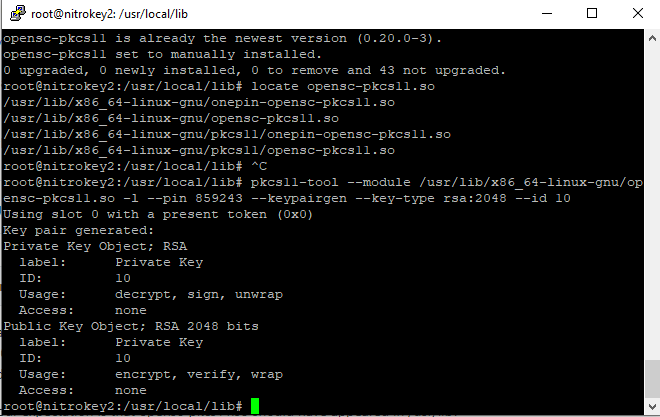
Note that the ID of this key is set to 10. We can use the following command to enumerate keys on the device.
shell
pkcs15-tool -D
We will need to provide the value of the “Key Ref” field of the private key object we wish to backup in the command below:
shell
sc-hsm-tool --wrap-key wrap-key.bin --key-reference 1 --pin 648219
The file generated in your current path, wrap-key.bin, is the raw private key material encrypted with the DKEK. In order to restore to another NitroKey HSM, you must have the wrap-key.bin file, your DKEK file, and its corresponding password. When the new NitroKey HSM is provisioned, import the same DKEK or DKEKs as the old device, and then use the below command to import the key back onto the HSM. This process would be repeated for each key to be backed up.
shell
sc-hsm-tool --unwrap-key wrap-key.bin --key-reference 10 --pin 648219
Conclusion
Once we have mastered the above, a lot of exciting possibilities become apparent. Signing or encrypting digital files, creating an internal certificate authority backed by a hardware root-of-trust, and protecting cryptocurrency wallets are only some of the applications where this sort of entry-level HSM shines. It is worth noting that this class of device would not be suitable for protecting the private key of a web server intended to handle any volume of traffic on the public internet, as its low concurrent operation count would quickly become a bottleneck.
Discussions and Comments
Click here to view and join in on any discussions and comments on this article.