The first thing you’re going to want to do is prepare a certificate signing request, and send it off to a certificate authority for signing. Next, the response from the CA needs to be combined with the private key material on your server so that it is available in your computer’s machine keystore. One benefit of working with SSLTrust is that we diligently work to provide a CA response in the format most easily understood by your server.
First, open up MMC.exe on your SQL box. Select File -> Add / Remove Snapin and add the “Certificates” Snapin.
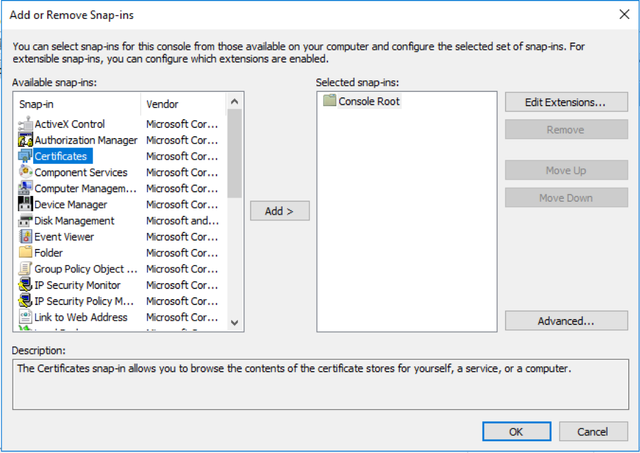
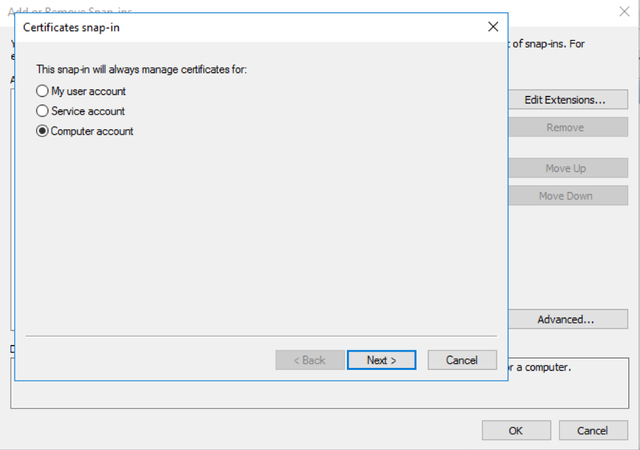
On the next screen, select Computer Account.
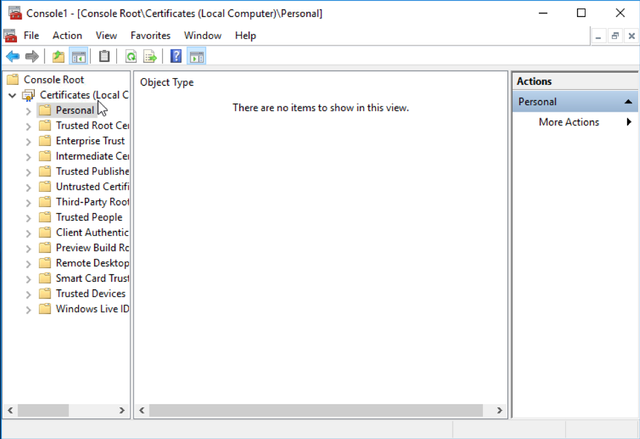
Expand the Certificates node on the left, and then right click on the Personal certificate hive.
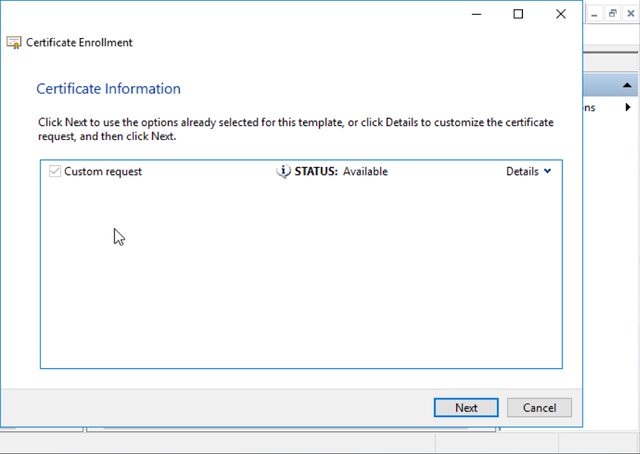
Select All Tasks -> Advanced Operations -> Create Custom Request.
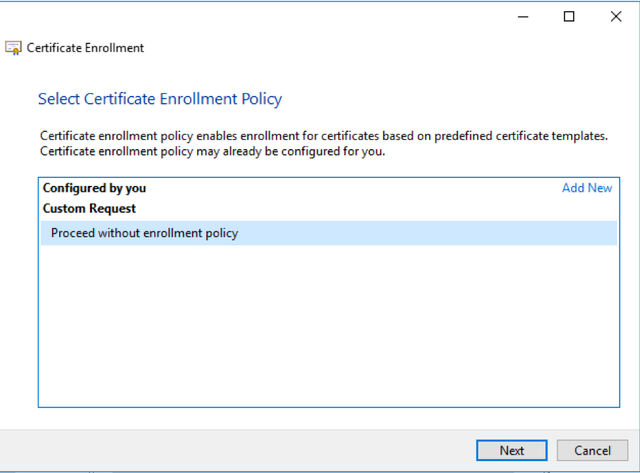
Select Proceed without Enrollment Policy.
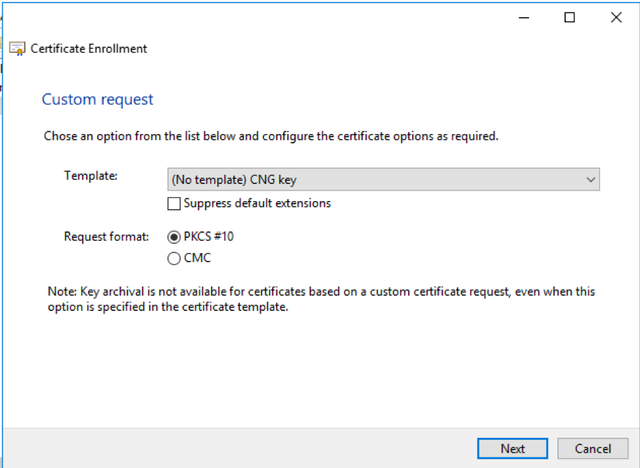
On the next screen, Select No Template CNG Key. SQL Server 2017 is able to support next generation storage of private key material. Leave the request format as PKCS # 10.
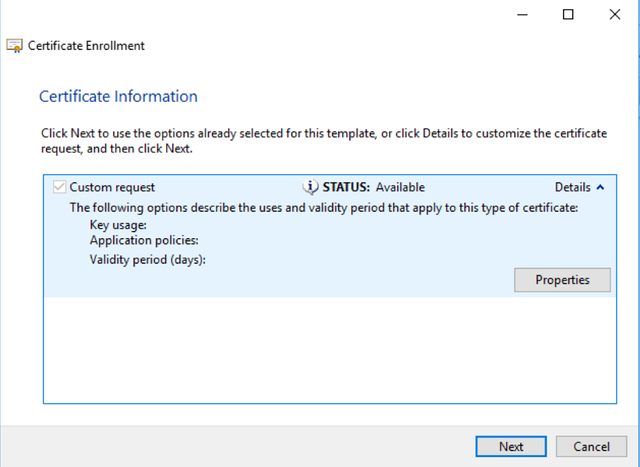
Select Details on the righthand side to dropdown the pane.
Select Properties.
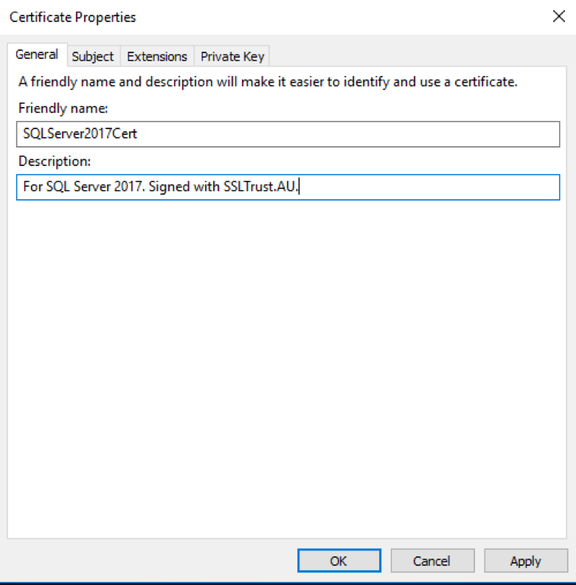
Give the certificate a Friendly Name and Description of your choice, and move to the Subject tab.
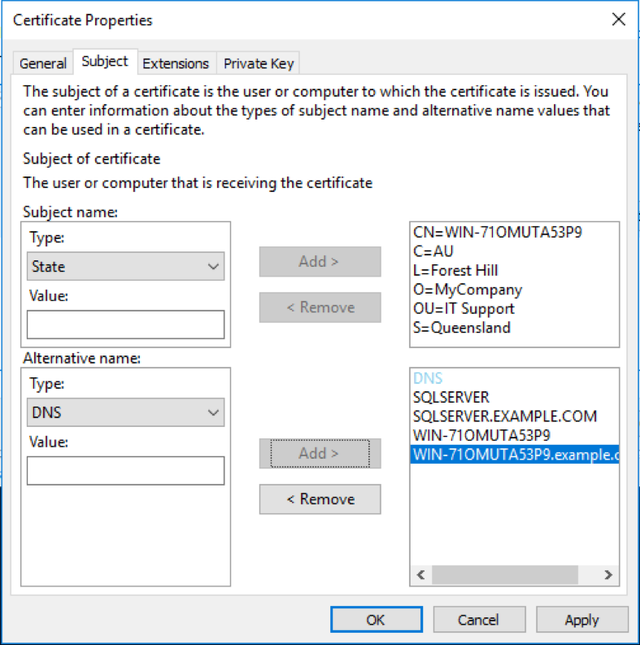
The next screen requires certain properties to be filled in in order for your certificate to be able to be signed correctly. The properties you will need to supply in the request from the top Subject Name pane are:
- Common Name (The hostname of your SQL Server)
- Country (Abbreviated, such as AU)
- State (Spelled in full, such as Queensland)
- Locality (Spelled in full, such as Forest Hill)
- Organization (Such as MyCompany)
- Organizational Unit (Such as IT Support)
And on the bottom Alternative Name pane:
DNS Name (One for each name the server might be addressed as by the client, including repeating the common name. The list might be: SQLServer, SQLServer.example.com,WIN-71OMUTA53P9, WIN-71OMUTA53P9.example.com)
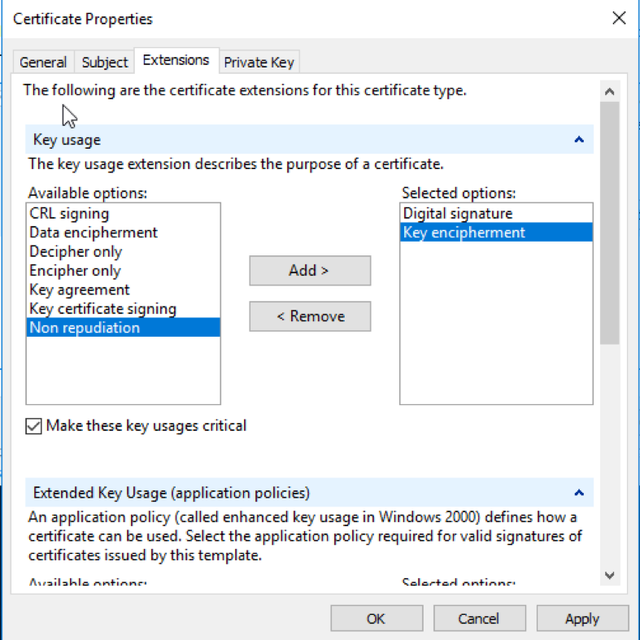
Next; Select the Extensions tab. Under “Key Usage” add “Digital Signature” and “Key Encipherment”.
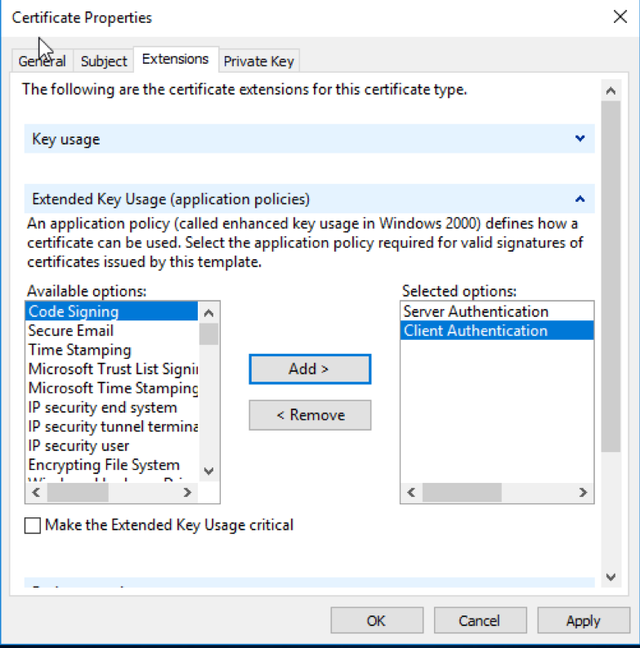
Under Extended Key Usage select “Server Authentication” and “Client Authentication”.
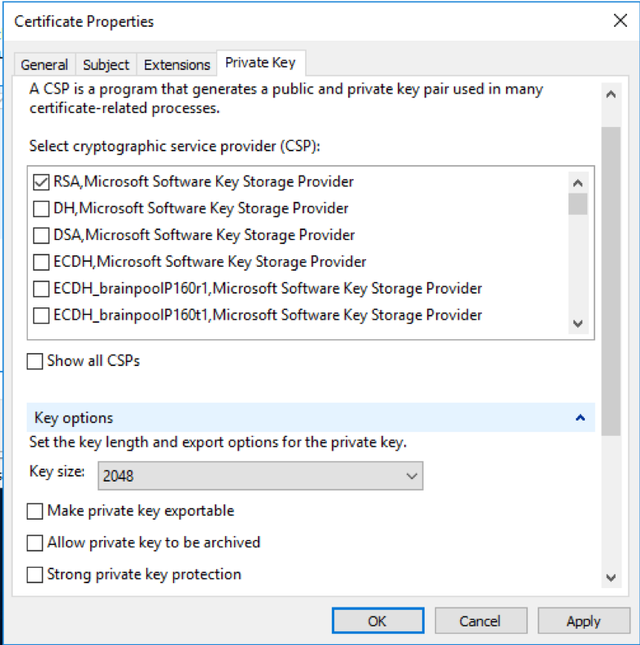
Next; Navigate to the private key tab. Under “Key Options”, make sure to set the “Key Size” to at least 2048 bits. If you are okay using the default protection mechanism of never being able to transport this key to another server, leave “Make private key exportable” unchecked. If you want to be able to export this keypair as .PFX later, check this box.
Select OK.
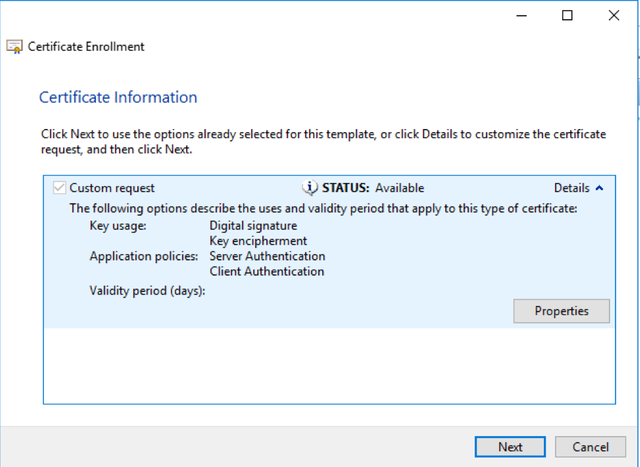
Select Next.
Save the “Base 64” CSR somewhere on your local file system. This .req file is what will get submitted to the Certificate Authority or through your SSLTrust configuration Panel for your SSL order.
The signed response will be returned to you as a .CER or .CRT file depending on the webserver options you select during submission. Double click this certificate, and allow Windows to automatically import it into the appropriate keystore. It will combine the signed response with the private key material, and the certificate will appear under the “personal” hive of your computer machine store.
Next, find the thumbprint of your signed certificate.
You can issue the powershell command (from an elevated CMD prompt)
shell
Get-ChildItem -path cert:\LocalMachine\My
To return a list of certificates in the store, and their thumbprints. It is important that the thumbprint is in all caps, which this cmdlet does by default.

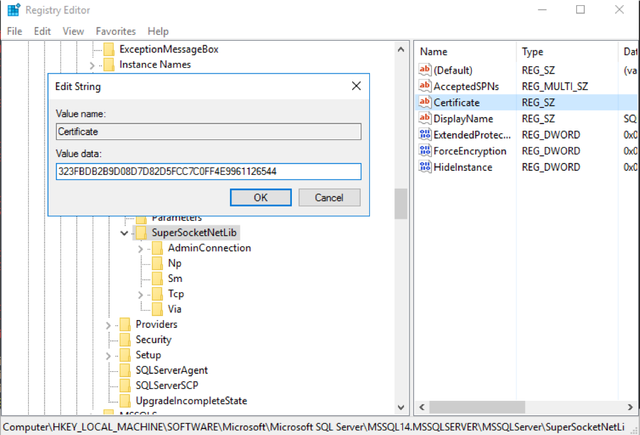
Paste this thumbprint value to the following registry location:
text
HKEY_LOCAL_MACHINE\SOFTWARE\Microsoft\Microsoft SQL Server\MSSQL.x\MSSQLServer\SuperSocketNetLib\Certificate
You can also optionally require encrypted connections (machines that do not request encryption in their connection strings will be denied. Be careful enabling this option in an existing environment) by setting the “ForceEncryption” DWORD in SuperSocketNetLib to 1.
Finally, restart SQL Server. Now, when you connect via SQL Server Management Studio, you will be able to select “Encrypt Connect” under “Options” in order to fully encrypt all communication with the SQL Server.
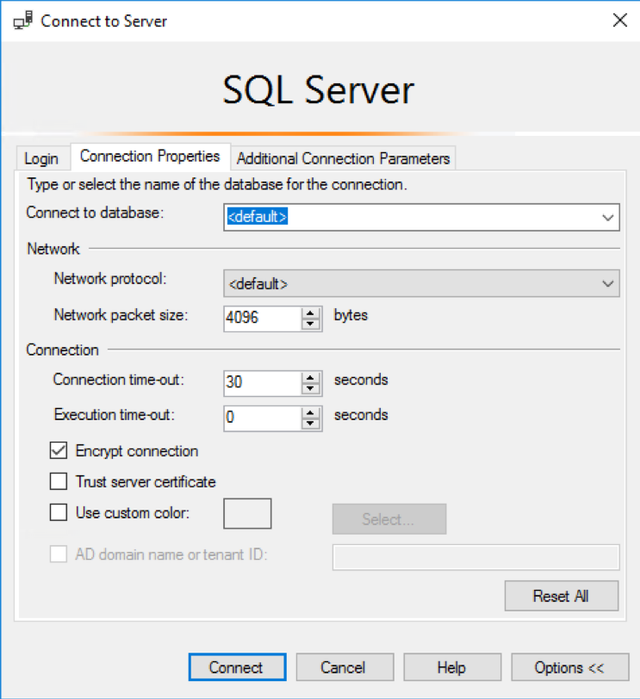
Applications that support it can have their SQL Connection String modified to include “encrypt=true”.
Discussions and Comments
Click here to view and join in on any discussions and comments on this article.